
03-3-2022
PET bottles are widely utilized in a variety of manufacturing sectors for packaging and refilling purposes. It is regarded as the most essential packaging material that will be used to store a large number of products. The quality and safety of the contents contained within are also ensured by PET packaging. Therefore, it is important to check the quality of PET products in order to deliver accurate products to your customers. Checking the thickness of PET bottle walls will help you to evaluate the uniformity of the goods is required to assure the quality and strength of the bottles. Thus, with the use of a bottle wall thickness gauge, it will be easy for you to measure the thickness of non-ferrous products like Plastics, performs, glass, water tanks, foam, aluminum, PET, etc. This lab testing instrument works on Hall Effect technology.
Here in this blog, we are going to discuss how the Hall Effect sensor of wall thickness gauge works. We will also discuss how you can easily test the thickness of PET bottles with the help of this lab testing equipment.
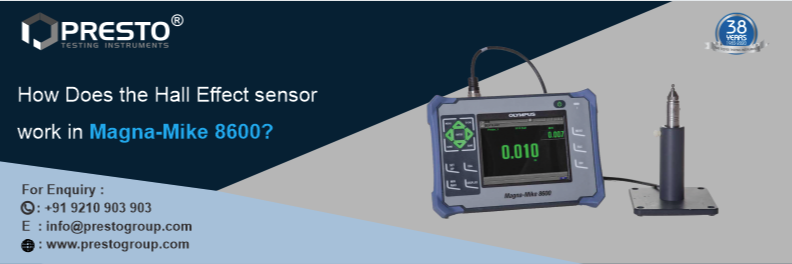
The Magna-Mike 8600 wall thickness gauge is one of the effective testing instruments that can be used for non-ferrous materials like PET bottles to test their quality. The PET bottle wall thickness gauge works on the principle of Hall Effect technology, a simple procedure that makes it useful to make the repeatable measurements of non-ferrous materials.
This wall thickness gauge 8600 is really easy to use. When the magnetic probe is held or scanned on one side of the test material and a tiny target ball (or disc or wire) is placed on the opposing side or dropped into a container, then the measurements will be taken. This Magnamike Hall Effect sensor on the probe determines the distance between the probe tip and the target ball. The measurements are promptly shown as an easy-to-read digital thickness readout on the huge color thickness display.
This lab testing instrument will easily measure the wall thickness of several materials and have wide applications in the packaging industry.
Below we have listed the features and technical specifications of this amazing lab testing equipment.
The MagnaMike 8600 is flexible, rapid, and reliable testing equipment that measures material thickness using Non-Destructive Techniques (no cutting or sectioning required). Fiberglass, metals, ceramics, glass, and polymers have their thicknesses measured with this testing gauge so that the right quality of materials will be delivered. This Olympus Magnamike 8600 wall thickness gauge has been equipped with several advanced features to make this lab testing equipment more unique and useful. Below we have listed the features of this testing instrument.
These are some advanced features that have been equipped in this lab testing equipment. Now, let us focus on its technical specifications.
Now, let us discuss how this Hall Effect works in Magnamike 8600 wall thickness gauge.
Hall Effect gauges may theoretically measure any non-magnetic material with a geometry that allows a probe tip to be placed on one side of a wall and a tiny target such as a steel ball to be placed on the other, up to a maximum thickness of around 1 inch or 25 mm. Thus the measurements will be directly displayed on the large color thickness display as an easy-to-read digital thickness reading.
A Hall Effect sensor is a type of electronic semiconductor that reacts to changes in magnetic fields by altering the voltage that appears across its surface when current travels through it. When a Hall Effect sensor is used for thickness gauging, it is combined with a powerful magnet to produce a magnetic field surrounding the sensor in a tiny probe. The magnetic field created by the probe magnet is bent by a target, such as a tiny steel ball, with the bending effect growing as the target gets closer.
The voltage across the Hall Effect sensor fluctuates predictably as the test piece thickness and hence the distance between the target and the probe changes. These voltage variations may be translated to thickness values using a software program that uses an established calibration curve once the equipment has been calibrated for a specific probe and target. Whenever you conduct the wall thickness gauge test with the help of this lab testing equipment then the target must be properly aligned with each other and can be positioned closely in contact with the testing piece.
If you want to know about the wall thickness gauge working, wall thickness gauge price, or other related information, then give us a call at +91 9210903903 or email us at info@prestogroup.com. Our team of technical experts will easily assist you with your queries.
Related Blogs

Salt spray test checks corrosion resistance of materials using a salt spray chamber. Essential for quality control in coatings, metals, and finishes.

Hot Air Oven uses dry heat for sterilizing glassware and metal tools, while an Autoclave uses steam under pressure—ideal for liquids and medical items.

GSM of fabric (Grams per Square Meter) indicates fabric weight and thickness. Higher GSM means denser, heavier fabric; lower GSM means lighter, thinner fabric.